NVR local interface - Intelligent Analytics
This window lets you review all events reported by the NVR's AI programming.
Click the X at the top right to close the window and return to the live view.
- Search window
- Statistics window
Search window
Here you can locate specific files you need.
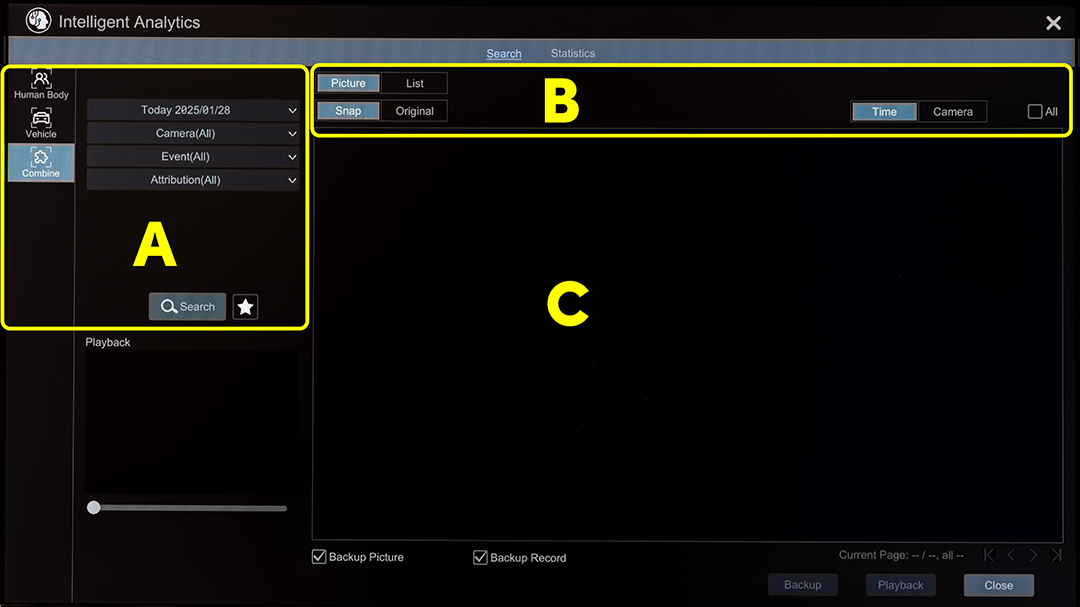
A) Filter section
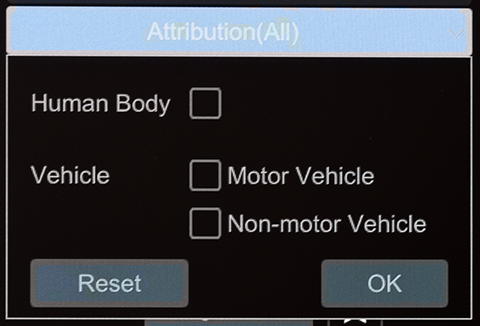
At the far left, select whether to search for humans, vehicles, or a mix. If you select Combine, click the Attribution dropdown to specify what all you want included.
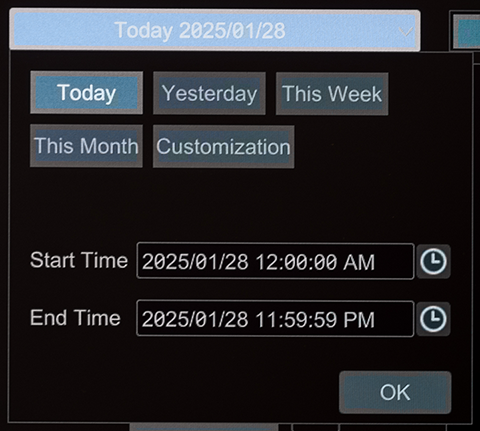
Select the time using either the quick select buttons or by manually editing the start and end times.
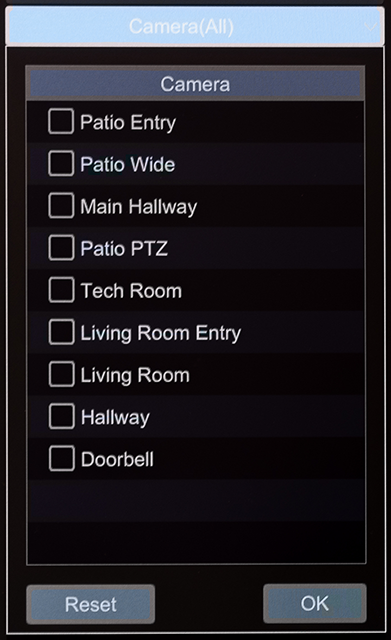
Select the cameras to include.
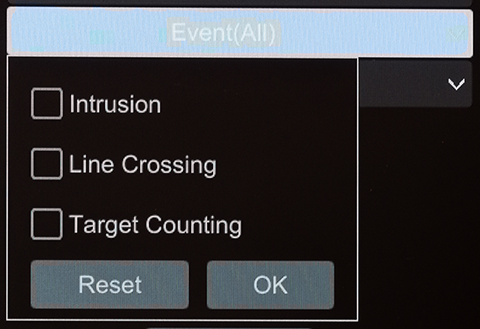
Select the sort of events to search for.
Click the star icon to save this set of filters as a favorite. If you have a favorite already saved, clicking the icon lets you load a previously saved filter.
Click Search to locate all events that match the criteria. You must click Search to update the results after changing a filter; the system does not do it automatically.
Below the Search button is the playback preview window. When you click on a video in the results window, it plays a preview here.
B) Presentation settings
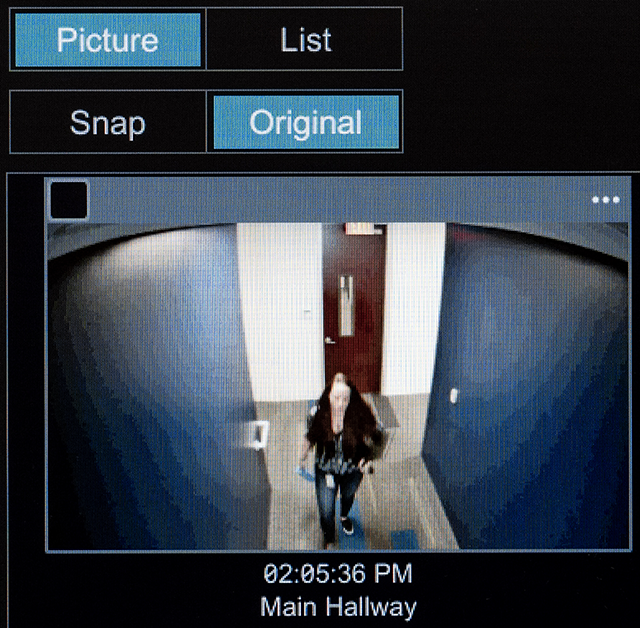
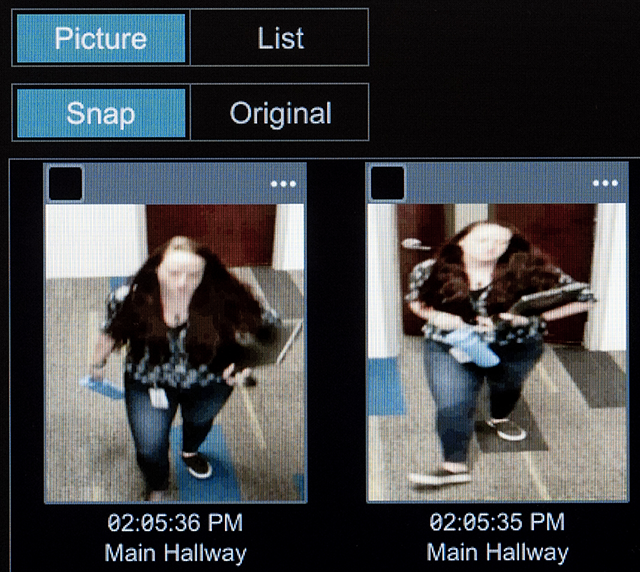
At the top, choose whether you want to view the results by image or in a tabular form. If you choose Picture, you can also choose to display the full camera image (Original) or to have a smaller image (Snap) cropped to the subject that activated the alarm.
At the top right, choose to sort the results by camera or by time.
Click the All button to select all files displayed in the results window.
C) Results window
This shows the results of the most recently executed search. If you change a filter, click the Search button to update the results.
Click on a result to preview it in the playback window.
In each result, click ︙ to view event details including the snapshot and full image, time stamp, camera, and event and target types. The Next and Previous buttons let you browse proximal events.
Click the selection box of a result to select it. You can select multiple results in this manner. If you have only selected one result, click Playback to view the video in fullscreen mode. Click Backup to save an archive of all selected results (below, you can opt to back up the picture, the recording, or both). Click Delete to remove those results.
Close returns you to the live view screen.
Statistics window
This page lets you view summary graphs of AI-reported incidents.
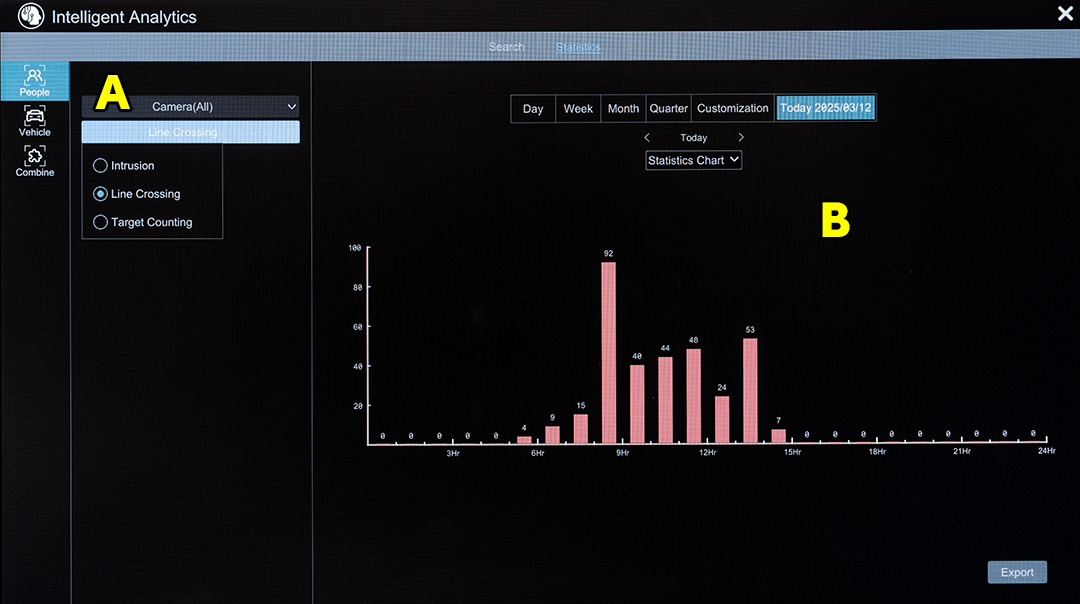
A) Filter section
Customize your search using the dropdowns.
At the far left, select whether to search for humans, vehicles, or a mix. If you select Combine, click the Attribution dropdown to specify what all you want included.
Select the time using either the quick select buttons or by manually editing the start and end times.
Select the cameras to include.
Select the sort of events to search for.
Click the star icon to save this set of filters as a favorite. If you have a favorite already saved, clicking the icon lets you load a previously saved filter.
Click Search to locate all events that match the criteria. You must click Search to update the results after changing a filter; the system does not do it automatically.
Below the Search button is the playback preview window. When you click on a video in the results window, it plays a preview here.
B) Results window
This shows the results of the most recently executed search. If you change a filter, click the Search button to update the results.
Click Export to send the data to a USB storage device.